To follow up on last week’s upload articles, I’m going to turn a couple of these boards into Black Magic Probe programmers:
From left to right: an STM Nucleo F103RB (any Nucleo will do, though), a board from eBay (many vendors, search for “STM32F103C8T6 board”), and Haoyu’s HY-TinySTM103T.
And let’s do it right, with a couple of custom PCB’s – here are three versions (the first one will keep its original firmware, actually). Each does have slightly different usage properties:
Each of these supports uploading, serial “pass-through” connection, and h/w debugging. Building one of these, or getting a pre-built & pre-loaded one, is a really good investment.
There are a number of different libraries available for sending pins to the Timeline on a Pebble watch, including those for Javascript, Node.js, Ruby, Python, PHP and C. To use any of these you need a unique user token which is a UUID unique to both an app installed on the watch and the user, I couldn’t find a straightforward description of what is required to get a token so I’ve detailed what needs to be done below.
Getting a token the easy way
If you just want to do it the easy way I’ve created a Timeline Token app which is available on the Pebble Appstore, once installed on your Pebble it will display the token and give you a short URL to view it on the web (to save retyping the lengthy UUID from the Pebble screen).
My Timeline Token app, aka the easy way
If you use my app you can jump straight to step 5 below to test it.
Regardless of whether you use my app or create one using the process below it will need to remain installed in the Pebble phone app for pins using the resulting token to come through to your watch.
Step by step guide
This is the process to create your own simple app to get a Timeline user token.
Step 1: Create an app
The app serves two purposes, it gets us the unique user token and enables pins to be sent to the watch.
Creating an app is easy to do online, no need to install an SDK or dev environment, first log in to CloudPebble.
Create a new app with the project type of “Pebble.js (beta)” and give it a name, eg. Timeline Token
Click on app.js under SOURCE FILES, delete the default code it gives you and replace it with the following:
/**
* Just gets the Timeline token
*/

var UI = require('ui');
var myToken;

Pebble.getTimelineToken(
function (token) {
console.log('My timeline token is ' + token);
myToken = token;
var tokenDisplay = new UI.Card({
subtitle: 'Timeline Token',
body: myToken
});
tokenDisplay.show();
},
function (error) {
console.log('Error getting timeline token: ' + error);
}
);
Then go to COMPILATION on the left and then click BUILD, when that is done click GET PBW to download the .pbw file.
Step 2: Add the app to the Pebble app store
This step is required so that Pebble have the UUID of your app and allows you to enable timeline support for it. You don’t need to publish the app, just uploading it and enabling timeline is sufficient.
On the next page click “Add a release” and upload the .pbw file you downloaded from step 1 above.
You do not need to publish the application, it just needs to be uploaded so that Pebble have the apps UUID which is required for sending the pins.
If the release status says “Validation pending” wait a few seconds and refresh the page and you should now see it showing Ready and you will now see the UUID in the Application data section above.
Now click Enable timeline button.
Step 3. Get the timeline token
Now back in CloudPebble, under COMPILATION click the BASALT button at the top to run the app in the Pebble Time emulator.
When it runs and shows the token on the emulated Pebble’s screen click the “VIEW APP LOGS” button where you will see your timeline token in the log, eg.
My timeline token is e6b41993c9604c458f7bee3cd501d0ec
Copy the token and save it in a safe place.
You need never use CloudPebble or the Developer Portal again once you have the token.
Step 4. Install the app on your phone
The final step is to load the app on to your phone as the pins will only work while the app is installed in the Pebble Time app.
Create a file eg. pebble.js with the following (inserting your user token where indicated)
var Timeline = require('pebble-api').Timeline;

var timeline = new Timeline();

var userToken = 'ENTER YOUR USER TOKEN HERE';

var pin = new Timeline.Pin({
time: new Date(),
duration: 10,
layout: new Timeline.Pin.Layout({
type: Timeline.Pin.LayoutType.GENERIC_PIN,
tinyIcon: Timeline.Pin.Icon.NOTIFICATION_FLAG,
title: 'Pin Title'
})
});

timeline.sendUserPin(userToken, pin, function (err) {
if (err) {
return console.error(err);
}

console.log('Pin sent successfully!');
});
Then run it with node pebble.js and you should shortly see the pin arrive on your Pebble.
The help page here details how you can create notifications, reminders and open apps using the pins as well as the names for the different icons that are available.
In the next post I’ll talk about the node I created for Node-RED to do this.
The reason behind the last post was so that I could create a node for Node-RED to send pins to the Timeline on a Pebble smartwatch.
To use this you obviously need a Pebble Time (or a classic Pebble once the Timeline update is available) but you will also need a Timeline user token which is unique to you the user and an installed Pebble app. I detailed in the last post about how you can create a simple app to get a token or you can just install my Timeline Token app on your watch and get one that way.
The Timeline User Token is entered into the node and is stored in the credentials file in your .node-red directory.
To send a pin into the Timeline msg.time needs to be set, this is the time that the pin will show in the Timeline and in the example flow above it is coming from the Inject node. The title of the pin can either be set in the msg.payload or in the title of the Pebble node itself.
Optionally the following additional items can be set:
msg.duration is an integer of the time in minutes that the pin will remain in the now view of the timeline.
msg.body can be used to set the body text of the pin.
If msg.notify is set to true then a notification will appear on the watch when the pin is created, otherwise it will be silently inserted into the timeline.
I’ve added it to npm so you can install it easily with npm install node-red-contrib-pebble and it can also be found on my github here.
Other things that could be implemented in the future are reminders and updating pins although the latter would require knowing the id of the pin, the id isn’t required for a basic pin but is for the notifications, I’m just using a UTC timestamp for that here.
There are many ways to experiment with embedded development, which is what the Arduino IDE really is all about. But before diving more into using the Arduino IDE with STM32 µCs, I’d like to mention another option, based on a Raspberry Pi (A+, B+, or 2):
It’s called the ARMinARM board, by a company called OnAndOffables: a board with an STM103RE, sitting on top of the RasPi, with lots of connections to communicate through.
I’ll briefly touch on alternatives, but I like this setup because of how these two boards work together. Unlike a Win/Mac/Lin setup, this combo has everything-in-one for development.
So here goes for this week’s episode of articles, dished out in small daily doses:
There are a number of different libraries available for sending pins to the Timeline on a Pebble watch, including those for Javascript, Node.js, Ruby, Python, PHP and C. To use any of these you need a unique user token which is a UUID unique to both an app installed on the watch and the user, I couldn’t find a straightforward description of what is required to get a token so I’ve detailed what needs to be done below.
Getting a token the easy way
If you just want to do it the easy way I’ve created a Timeline Token app which is available on the Pebble Appstore, once installed on your Pebble it will display the token and give you a short URL to view it on the web (to save retyping the lengthy UUID from the Pebble screen).
My Timeline Token app, aka the easy way
If you use my app you can jump straight to step 5 below to test it.
Regardless of whether you use my app or create one using the process below it will need to remain installed in the Pebble phone app for pins using the resulting token to come through to your watch.
Step by step guide
This is the process to create your own simple app to get a Timeline user token.
Step 1: Create an app
The app serves two purposes, it gets us the unique user token and enables pins to be sent to the watch.
Creating an app is easy to do online, no need to install an SDK or dev environment, first log in to CloudPebble.
Create a new app with the project type of “Pebble.js (beta)” and give it a name, eg. Timeline Token
Click on app.js under SOURCE FILES, delete the default code it gives you and replace it with the following:
/**
* Just gets the Timeline token
*/

var UI = require('ui');
var myToken;

Pebble.getTimelineToken(
function (token) {
console.log('My timeline token is ' + token);
myToken = token;
var tokenDisplay = new UI.Card({
subtitle: 'Timeline Token',
body: myToken
});
tokenDisplay.show();
},
function (error) {
console.log('Error getting timeline token: ' + error);
}
);
Then go to COMPILATION on the left and then click BUILD, when that is done click GET PBW to download the .pbw file.
Step 2: Add the app to the Pebble app store
This step is required so that Pebble have the UUID of your app and allows you to enable timeline support for it. You don’t need to publish the app, just uploading it and enabling timeline is sufficient.
On the next page click “Add a release” and upload the .pbw file you downloaded from step 1 above.
You do not need to publish the application, it just needs to be uploaded so that Pebble have the apps UUID which is required for sending the pins.
If the release status says “Validation pending” wait a few seconds and refresh the page and you should now see it showing Ready and you will now see the UUID in the Application data section above.
Now click Enable timeline button.
Step 3. Get the timeline token
Now back in CloudPebble, under COMPILATION click the BASALT button at the top to run the app in the Pebble Time emulator.
When it runs and shows the token on the emulated Pebble’s screen click the “VIEW APP LOGS” button where you will see your timeline token in the log, eg.
My timeline token is e6b41993c9604c458f7bee3cd501d0ec
Copy the token and save it in a safe place.
You need never use CloudPebble or the Developer Portal again once you have the token.
Step 4. Install the app on your phone
The final step is to load the app on to your phone as the pins will only work while the app is installed in the Pebble Time app.
Create a file eg. pebble.js with the following (inserting your user token where indicated)
var Timeline = require('pebble-api').Timeline;

var timeline = new Timeline();

var userToken = 'ENTER YOUR USER TOKEN HERE';

var pin = new Timeline.Pin({
time: new Date(),
duration: 10,
layout: new Timeline.Pin.Layout({
type: Timeline.Pin.LayoutType.GENERIC_PIN,
tinyIcon: Timeline.Pin.Icon.NOTIFICATION_FLAG,
title: 'Pin Title'
})
});

timeline.sendUserPin(userToken, pin, function (err) {
if (err) {
return console.error(err);
}

console.log('Pin sent successfully!');
});
Then run it with node pebble.js and you should shortly see the pin arrive on your Pebble.
The help page here details how you can create notifications, reminders and open apps using the pins as well as the names for the different icons that are available.
In the next post I’ll talk about the node I created for Node-RED to do this.
The reason behind the last post was so that I could create a node for Node-RED to send pins to the Timeline on a Pebble smartwatch.
To use this you obviously need a Pebble Time (or a classic Pebble once the Timeline update is available) but you will also need a Timeline user token which is unique to you the user and an installed Pebble app. I detailed in the last post about how you can create a simple app to get a token or you can just install my Timeline Token app on your watch and get one that way.
The Timeline User Token is entered into the node and is stored in the credentials file in your .node-red directory.
To send a pin into the Timeline msg.time needs to be set, this is the time that the pin will show in the Timeline and in the example flow above it is coming from the Inject node. The title of the pin can either be set in the msg.payload or in the title of the Pebble node itself.
Optionally the following additional items can be set:
msg.duration is an integer of the time in minutes that the pin will remain in the now view of the timeline.
msg.body can be used to set the body text of the pin.
If msg.notify is set to true then a notification will appear on the watch when the pin is created, otherwise it will be silently inserted into the timeline.
I’ve added it to npm so you can install it easily with npm install node-red-contrib-pebble and it can also be found on my github here.
Other things that could be implemented in the future are reminders and updating pins although the latter would require knowing the id of the pin, the id isn’t required for a basic pin but is for the notifications, I’m just using a UTC timestamp for that here.
Small microcontroller chips, modern laptops/desktops – the range of computing power is enormous nowadays. So enormous, that it can be pretty hard to grasp the magnitude.
This week, I’m going to do some explorations, using a HY-Tiny board with an STM32F103 on it. Or to be put it differently: a fairly low-end but popular 32-bit ARM Cortex M3 µC, running at 72 MHz, with 128 KB flash and 20 KB RAM. It draws up to 40 mA at 3.3V.
Let’s find out what this little gadget is capable of:
So there you have it: a µC the size of a fingernail, vastly outperforming the Apollo Guidance Computer used to put man on the moon, less than half a century ago. You’ve got to wonder: would we still be able to perform this feat, using just an STM32F103? – I have my doubts…
A little Saturday afternoon project last weekend was putting together this geiger counter kit from RH Electronics in Israel, paired with a soviet SBM-20 Geiger-Müller tube sourced from an eBay seller in the Ukraine. Total cost was £32 which seems very reasonable to me.
The RH Electronics kit comes with all the components apart from the Geiger-Müller tube, it is all through hole components (there are a few SMD components in the design but these are presoldered) and the PCB is well labelled so it is very easy to build. It runs on 4.5-5.5V, has a very low power consumption, stable HV output for the G-M tube and support for both 400V and 500V tubes. It also provides a handy interrupt output so that it can easily be linked to your favourite microcontroller.
I connected the INT output from the geiger counter to the INT1 pin on one my Tiny328 boards (an ATmega 328 combined with an RFM12B radio) and both are powered from a USB wall adapter. This Arduino code runs on the Tiny328 and counts the interrupts from the geiger counter, once a minute it sends the resulting CPM (Counts Per Minute) over the RFM12B wireless network. This is then picked up by another Tiny328 connected via a serial-USB adapter to my home automation server along with the data from all my other wireless sensors.
On the server Node-RED automatically processes the incoming serial packets sending the data to different MQTT topics based on the node number. eg, the geiger counter node is number 23 so the CPM is sent to the “rfm12b/23/1” topic. An MQTT input node then takes this value, saves it into a global context (context.global.radiation) and then outputs to a more human readable/memorable topic name of “radiation”. Node-RED also sends the value to my local emoncms install for my own logging and graphing purposes.
Radiation graph in Emoncms
I also wanted to submit my CPM readings to Radmon, a community website for logging background radiation around the world. This was easy to do with Node-RED as data is submitted to Radmon via a simple URL of the format: http://radmon.org/radmon.php?function=submit&user=USER&password=PASS&unit=CPM&value=CPMVALUE
Where USER and PASS are the details you used when registering your Radmon account and CPMVALUE is the counts per minute from the geiger counter.
All that is then required is a simple flow to grab the last CPM from the global context and send it to that url using the http request node. An inject node fires that process off every 15 minutes.
Last week’s exploration of “processing with limited computing power” a few decades ago has led me into another direction which turned out to be mesmerising and addictive…
Once again, there is an awful lot of ground to cover this week, but with a bit of luck, it’ll end up being a decent bird’s eye view of what this FPGA (and CPLD) stuff is all about…
As you may know, the various websites here at JeeLabs are served locally. Houten offers very fast Fiber-To-The-Home connections, my ISP (XS4ALL) is excellent, and I don’t see the point of putting everything in the cloud. Sure, it’s a bit more work to keep going, but this way I can delude myself into thinking that I am “the master of my own universe” …
This Mac Mini server has been doing all the work for several years now:
But for various reasons it’s now time to revisit that setup and simplify things further:
As you’ll see, I’m jettisoning a lot of dead weight. The resulting server is much cheaper, consumes far less energy, is more robust, has fewer moving parts, is easier to manage, and handles page requests much faster than before. What is there not to like about this, eh?
I’m one of the lucky 200 that got their hands on the early beta of Espressif’s new ESP32 chip evaluation board. It is the “big brother” to the popular ESP8266, Espressif has though noted that it should not be treated as an ESP8266 replacement and that it is targeting “different market”. The specs are impressive indeed, it is not just an upgrade, it is a whole new concept:
Faster WiFi– Wifi has been upgraded to support HT40 speed (150 Mbps)
Bluetooth Low Energy and Classic
Dual core processor– 2x Tensilica L108 processors clocked at up to 160 MHz
Low Power Mode Improvements– ADC conversions, level thresholds, etc.. can now be performed in deep sleep
Security– Hardware accelerated AES and SSL, and more undisclosed improvements.
I also received an email from Espressif with the following ESP32 related documentation, the email message politely asks that these documents are not distributed (so please don’t ask):
ESP32 Specifications
ESP-WROOM-03 Specifications
ESP32 Chip Pin List
ESP32 Getting Started Guide for SDK based on FreeRTOS
To be precise, the evaluation board is using an ESP31, not an ESP32. Here is what Jeroen (aka Sprite_tm) describes in this post:
The ESP31 is a sort of engineering sample; we use it to figure out bugs and test most of the hardware. 99% of the things inthere will also be the same in the ESP32; there will be some small tweaks like the aforementioned memory map where we think we can improve the design without taking too much risk. For what I know, the ESP31 as is will not go into mass production, but everything you can do with the ESP31 will be possible on the final ESP32 as well.
The evaluation board itself came in the form of an ESP-WROOM-03 board and a breadboard friendly breakout PCB. The ESP-WROOM-03 comes unsoldered, the 1.27 pitch makes it nontrivial to solder, and there are reports already of folks destroying their board while trying to do the soldering. I used solder paste and a heat gun to build my setup, here are some pictures:
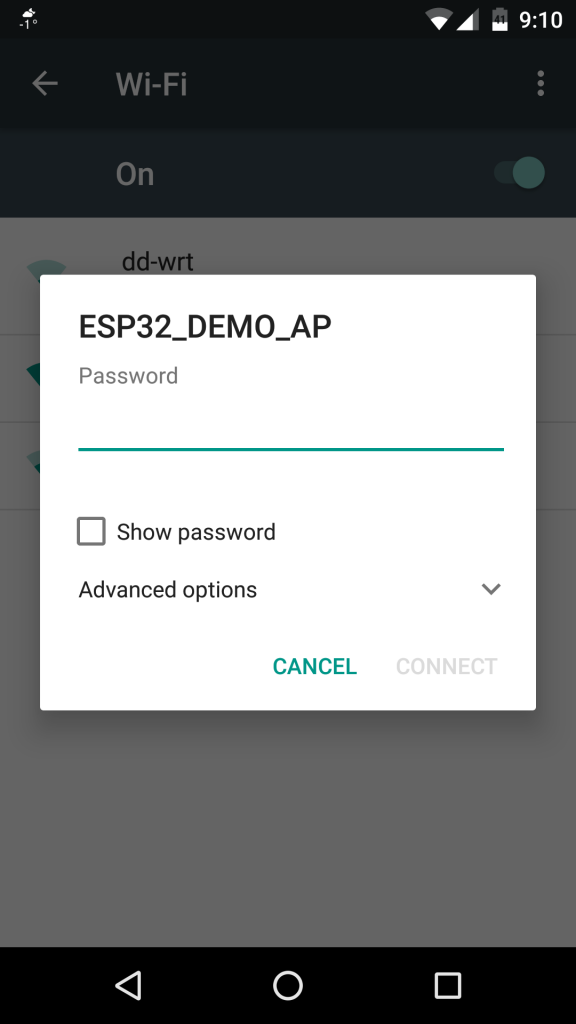
I wired up my board on a breadboard, hooked up a 3.3V FTDI cable and.. it lived:
The debug output suggests a SoftAP is started, and indeed my phone locates it under the name ESP32_DEMO_AP. It seems to be password protected though, and while I’m pretty sure the password is clearly stated in the documentation I received, I admit I haven’t read it yet..
Next steps are setting up the SDK, doing a “Hello, world” and further deep-diving.
Most of us will have to wait for the summer sunshine before we can enjoy outdoor dining with friends and families. Thankfully, outdoor patio heaters are available these days and keep us warm whilst outdoors. It is good to know that heaters are not only useful inside our homes and are capable of warming us up if we want to enjoy a short outdoor activity during winter.
There are two options when it comes to outdoor patio heaters for sale in the market these days: electric or propane. Similar to other things that we buy for our home, it is important to research on the advantages and disadvantages these two types of heaters bring. By knowing the product’s strength and weaknesses, you can weigh which is most suitable for your needs.
An electric patio heater uses radiant heat in order to warm its surrounding. Because it directly affects the objects around, electric patio heaters warm a lot quicker. Electric patio heaters are usually the preferred type of heater if there are small children around. People find the electric option a lot safer because it has no open flames and uses electric bulbs instead. Some think the electric heater does not require a lot of maintenances but only needed bulb replacement after a while. However, electric patio heaters do not provide the same heat output as the propane heater option. Apart from that, you need to have an electric outlet to make the heater work. So if you don’t have a power socket around your patio, expect that you will need a few meters of power cord extension to plug inside your house.
The propane patio heater is usually the most preferred option when it comes to heating because the amount of money you spend using it is far less expensive in comparison to electric heaters. Maintenance costs are also cheaper. Propane heaters work by warming the air around the area and may take some time before you can feel the effects. Despite waiting a bit for the propane heaters to warm up, it provides a higher heat output than electric. Apart from that, propane heaters are a lot reliable because it will still work despite a power outage. Over the years, improvements were made to make it suitable and less “dangerous” even if there are children around. Despite the advantages it has over electric heaters you need to be careful when using propane heaters and ensure it will only be used outdoors. Propane heaters release carbon monoxide and should always get proper ventilation.
Regardless of the type of patio heater, you can be assured that electric and propane electric heaters are effective tools for outdoor heating. Just align your expectations with the product you purchased to make sure you will not feel disappointed after the purchase.
The term- peer support is perhaps known to many people. It, in fact, denotes the help or assistance to people, who are ill mentally or physically. The help can be practical, emotional or social support. However, very often, such support is offered mutually, enabling the peers to get assistance.
The peer support system can offer lots of benefits. It can increase one’s level of confidence, self-esteem and also positive sensation. Often, the peer support workers realize a high enhancement in their personal capability of coping with the mental health issues. In addition to it, the peer support can also improve the overall health because it can reduce the possibility of hospital admissions.
Persons, who can get benefit from the support
The plans on peer support, arranged by Mental Health Charity, have been designed in such a way that all the peer supporters, who have enough training, may assist the peers to solve the following problems.
Anxiety
Addiction
Depression
Dementia
Bereavement and some other mental health-related conditions
Peer Support of various types
Peer Listening–
The peer supporters sometimes give listening service and may also possess a great counseling skill, which comprise non-verbal or verbal interaction, vigorous listening and privacy. Most of the peer supporters have accomplished some training to offer formal help to the peers.
Peer Education–
It engages the instruction of one peer to the other on a definite topic, for example, the management of the depression, addiction or anxiety. It will usually comprise a group that includes the peers of almost same similar status, age or background.
Peer Tutoring–
This is a system, where the peer supporter helps the peer, of younger age or same age with the social or academic and social learning. This help presented by any peer trainer may be cross-curricular. It can be in the way of paired writing or reading.
Peer Mentoring–
An instance of peer monitoring is the buddy system. Here, the persons, who have obtained some guidance, are associated to some new team and serve as a mentor, pal or guide to relieve people with new setting.
A different feature of this mentoring system is related to the helpful role model that involves a long-term dedication of a mentee and a guide. The peer adviser is bonded to the mentee. He has the function of listener as well as negotiator.
Peer Mediation–
It is also called as the clash resolution. The best peer mediator is also qualified particularly in the skills of resolving the conflict. They assist people to get solutions of all the clashes in informal and formal circumstances. It is hard to locate an association assuming only the peer mediation system, although such type of model is sometimes an element of a full peer support plan.
Thus, get these best peer supporter and improve your mental condition.
As the end of 2015 is approaching and now that the new server setup has been completed, it’s time to clean up some remaining loose ends. Spring cleaning is early, here at JeeLabs!
Next week will be a good time for reflection and my new year’s resolutions. For now, I just want to go into some topics which didn’t seem to fit anywhere else. In daily doses, as usual:
I’m pleased with the new Odroid XU4 server so far. The Mac Mini is being re-purposed as Liesbeth’s new Mac – a nice SSD-based setup with 8 GB of RAM. Its Core 2 Duo @ 2.66 GHz will be a step up from the 5-year old 1.4 GHz MacBook Air’s she’s been working on.
Which frees up that 11″ MBA for my own portable use again – it’s a fantastic little laptop!
Having a pet in the house comes with several responsibilities. No matter, it is a dog or a bird; it needs equal attention, a safe and hygienic place to live and entertainment. So, if you are ready to devote some of your time to take care of your pet then you can surely get one. When it comes to getting a pet, parrots are often taken into consideration. It is due to the fact that they are lovable and also great source of entertainment as they mimic people and make others laugh.
One of the major things of consideration when getting a parrot is a cage in which it can live. There is a wide range available in the market like parakeet cages with stand, round cages, travel cages etc. You can select the cage as per your requirements but you need to be sure of the fact that it will offer a comfortable place for the bird to live in.
There are a number of manufacturers that design parrot cages but you should prefer getting the one that is large enough, has appropriate bar spacing, water and food dispenser, fun accessories etc. In addition, you can also take a look at the design and style of the cage so that it compliments your house.
Parrots are intelligent birds and can easily be trained. The training becomes much easier if the bird receives comfort and proper attention.
Train your parrot for talking
Parrots have vocals and hence they are able to mimic our speech. Not all parrots can talk on their own but if they are provided proper training, they can talk and mimic whatever you say. In order to train the parrot, the first thing that you need to do is to check out whether it is interested in learning or not. Those who are interested grasp the things more quickly. You will see that they listen to you carefully while you are whistling or talking.
In order to get the effective results you should try to talking to it. Always make sure that you accompany the words along with actions so that the parakeet can understand your actions. Repeating the same words during the conversation will help the bird in grasping it quickly. You can also place the cage in the living room where the bird can hear the conversation and learn things. You can also set a reward system like giving it grapes or its favorite food when it behaves nicely. One important thing that you should follow while training your pet is to keep distractions like TV or radio away.
As the last few days of 2015 pass, I’d like to reflect on the recent past but also look forward to things to come. For one, the JeeLabs weblog is now thriving again: the new weekly post-plus-articles format has turned out to suit me well. It keeps me going, it’s oodles of fun to do, and it avoids that previous trap of getting forced into too-frequent daily commitments.
Apart from a summer break, every week in 2015 has been an opportunity to explore and experiment with physical computing topics, several ARM µCs, and various software ideas.
I’d like to close off 2015 with a deeply worrisome but nevertheless hopeful note. While this is a totally technology-focused weblog, it has not escaped me that we live in very troubling times. Never in history have so many people been on the run, fleeing home and country for the most basic of all human needs: a safe place to live. We’ve all seen Aryan Kurdi’s fate:
An innocent three-year old boy, born in the wrong place at the wrong time, trying to escape from armed conflict. He could have been me, he could have been you. His tragic fate and that of many others could have been avoided. Europe offers a peaceful and prosperous home for half a billion people – accommodating one percent more is the least we can do.
I’m proud to see countries rise to the occasion, and put humanity and the planet first. Let’s cherish our compassion as well as our passion, our understanding as well as our creativity.
For 2016, I wish you and yours a very open, respectful, and empathy-rich planet.
As the end of 2015 is approaching and now that the new server setup has been completed, it’s time to clean up some remaining loose ends. Spring cleaning is early, here at JeeLabs!
Next week will be a good time for reflection and my new year’s resolutions. For now, I just want to go into some topics which didn’t seem to fit anywhere else. In daily doses, as usual:
I’m pleased with the new Odroid XU4 server so far. The Mac Mini is being re-purposed as Liesbeth’s new Mac - a nice SSD-based setup with 8 GB of RAM. Its Core 2 Duo @ 2.66 GHz will be a step up from the 5-year old 1.4 GHz MacBook Air’s she’s been working on.
Which frees up that 11” MBA for my own portable use again - it’s a fantastic little laptop!
The rsync utility is an amazing workhorse tool: it synchronises file system trees in a very efficient manner, only sending changes in data. Which is particularly useful across a network connection, as it can save dramatically on I/O bandwidth and speed up the whole process, often by several orders of magnitude when compared to a full copy.
Perhaps even more impressive, is that rsync knows how to send changes between binary files when some parts of the data have moved up or down in the file. In other words, even when you insert or remove some bytes in a file, moving the rest of the information to a different offset in the file, rsync will still know how to avoid sending most unchanged data.
Check these pages on the algorithm rsync uses, if you’re interested. It’s incredibly clever.
The second reason why rsync is such a useful tool, is that it has very sensible defaults and a huge set of command-line options to adjust its behaviour.
On the new server at JeeLabs, rsync is used for backup. As previously described, these cron entries create a set of 7 daily backups, as an easy way to recover from all sorts of mishaps:
Given the current server’s root disk contents of 11 GB, this requires about 77 GB on the backup SSD. It’s a great safety net, but there are still some drawbacks:
each backup is a “full backup”, hence the 7x storage need for a full set
local backups can easily get damaged (either by accident or maliciously)
each backup will copy more files than strictly necessary
To explain that last point: although rsync only copies differences, the above design uses last week’s copy as reference when making a new backup. So when a file changes, it will need to be copied during each of the next 7 backups, to replace that weekday’s previous version.
Which brings us to a feature in rsync called “–link-dest” which is extremely useful for rotating backup scenarios like these. Here’s the what it does:
when copying (eh, rsync’ing) from A to B, we can specify a third area to rsync, which it will use as alternate reference for the end result in B - let’s call it B’ for now
when rsync decides that file F in A is newer than file F in B, it will first check file F in B’ - if present, and if F in B’ is already identical to F in A, then instead of copying F to B, it will create a hard link from F in B’ to F in B
It can be a bit tricky to wrap your mind around this, but the effect is that B’ is treated as a “preferred backup source” for B. If B’ already has the right file, rsync re-links to it instead.
If F in A is different from both F in B and B in B’, then copying will take place as before - including the clever difference-only sending that rsync always uses. Likewise for all edge cases, such as F not being present in B or B’. The “–link-dest” option only matters in the above very specific case: F in A is the same as F in B’, but differs from F in B. Then, we link.
So why not simply re-link file F in area B to file F in area A?
After all, that too would appear to have the same effect. Two reasons:
F in A is the original, if it changes, we do not want F in B to change (then it would no longer be a backup, but just an extra link to the “live” original!)
The “–link-dest” approach works across file systems and across different machines. Hard links can’t. This makes link-dest an extremely useful option, as you will see.
Here are the modified cron entries to activate the link-dest mechanism:
We simply add one extra command-line option, in which the backup from the previous day is used as B’ reference. The effects are quite dramatic:
changed files get copied over, as before
files which have not changed since the previous day become a hard link
as a result, total disk usage for these 7 backups is nearly the same as 1 backup
note also that if all files change every day, then this won’t save any disk space
less copying: a change gets copied over once, then all future backups link to it
directories can’t be hard-linked, they are still copied - this only affects files inside
In case of the JeeLabs server, disk space for the 7 backups dropped by over 50 GB. That’s not only less data to store, it’s also less data to copy in the first place. At the moment (end 2015), each daily full backup scan on the server takes 3..4 minutes for 11 GB of data.
And what about off-site backups?
Ah, yes. That’s where things really take off with this rsync trick: the link-dest mechanism also works across the network! Again, file changes get sent over as before. But only once - after that, a re-link on the remote backup is all that’s needed to track each changed file.
This is precisely how the backup server at JeeLabs has been setup. Every day, shortly after the main server backup has run, a cron job starts and uses that backup as source for (again) a rotating backup set. The backup server has an extra level of security, in that it can’t be written to from any other machine. Instead, it pulls its backups from the main server.
The result is a second rotating backup set on another system, which can’t be changed from the original server. This is currently also a set of 7 daily backups (with hard links to save on disk space), but it could have been set up for any number of backups and any update rate.
Off-site backups are just as easy. Given that rsync is so efficient in its use of bandwidth, such backups can be maintained over a fairly modest internet connection.
Also good to know: rsync supports ssh-based encrypted sessions and optional compression.
So let’s cherish rsync as one of the unsung heroes in today’s sea of data!
With the original Mac Mini server now decommissioned, this also marks the end of the HouseMon installation here at JeeLabs. In this case, it was the older 0.7.0 release - based on Node.js and written in CoffeeScript - HM 0.7 has served us well, and now it’s gone…
Unfortunately, there is no practical replacement for HouseMon at the moment - yet it sure would be a shame to lose all new readings still coming in from over a dozen wireless sensor nodes. So for the time being, we really should keep something going to collect that data…
HouseMon has always logged all its raw incoming data in the form of daily log files. The format of these files has not changed since the very start: text files, one line per reading, a millisecond time-stamp, the actual data in the raw packet format generated by RF12demo, and with each file rotated at midnight (UTC). Here are a few entries:
L 16:06:58.864 usb-ttyUSB0 OK 9 74 36 58 235 130 127 244 234 170 139 30 24
L 16:07:00.334 usb-ttyUSB0 OK 19 96 15 12 21 17 7 0
L 16:07:02.397 usb-ttyUSB0 OK 3 130 151 12 0 130 102 105
This format is easy to parse, handles any number of incoming sources, and above all: it’s the raw incoming data, so it represents the most direct sensor data - before decoding.
There are now some 8 years of log data at JeeLabs, all nicely stored in future-proof flat text files, one per day, and gzipped. The total disk space used is a very modest 765 MB so far.
The easiest for now would be to simply continue to log all incoming packets in this same format. Even if there is no server-side software running to interpret that data right now. Once a new implementation is ready, we can then “replay” all the raw data and convert it to whatever database format the new setup uses.
Here is a small JavaScript file called posthouse/index.js which does just that:
'use strict'; // allows use of new ES6 syntax and features with node.js

let FTDI = 'ttyUSB0';
const PATH = './logger';

let serial = require('serialport');
let fs = require('fs');

fs.mkdir(PATH, () => {});

let dateFilename = (now) => {
  let y = now.getUTCFullYear();
  let d = now.getUTCDate() + 100 * (now.getUTCMonth() + 1 + 100 * y);
  let path = `${PATH}/${y}`;
  if (!fs.existsSync(path)) {
    fs.mkdirSync(path)
  }
  return `${path}/${d}.txt`;
}

let timeString = (now) => {
  let digits = now.getUTCMilliseconds() + 1000 *
              (now.getUTCSeconds() + 100 *
              (now.getUTCMinutes() + 100 *
              (now.getUTCHours() + 100)));
  return digits.toString().replace(/.(..)(..)(..)(...)/, '$1:$2:$3.$4');
}

let options = { baudRate: 57600, parser: serial.parsers.readline('\n') };
let rf12demo = new serial.SerialPort(`/dev/${FTDI}`, options);

let currFile, currDate;

rf12demo.on('open', () => {
  rf12demo.on('data', (data) => {
    let now = new Date;
    if (now.getUTCDate() != currDate) {
      currDate = now.getUTCDate();
      if (currFile)
        fs.close(currFile);
      let filename = dateFilename(now);
      console.log(`${now} - ${filename}`);
      currFile = fs.openSync(filename, 'a');
    }
    data = data.replace('\r', '');
    fs.write(currFile, `L ${timeString(now)} usb-${FTDI} ${data}\n`);
  });
});
Most of the code comes almost unchanged from the HouseMon 0.7 setup, but there are some nice details worth pointing out:
this is JavaScript, even though there is not a function keyword in sight
in fact, this is the new“JavaScript ES6”, supported in new browsers and Node.js 5.x
ES6 adopts some CoffeeScript’isms: “=>” function notation and string interpolation
to activate ES6 in Node.js 5.3.0, the "use strict" at the top is all that’s needed
this only depends on one package, installed as: npm install --save serialport
switching from Mac OSX to Linux required only a “ttyUSB0” device name change
As for the logic of the code itself: all fairly simple stuff, just opening a serial port and saving incoming lines of text in the proper file, while rotating to a new file on each new day.
The above now captures all sensor data, waiting for a new HouseMon design. Onwards!
A cloud, captured inside a house - how very appropriate for this article!
With the completion of the recent server migration, and some related changes, JeeLabs is now officially no longer “in” the cloud, i.e. there is no internet server “out there”, involved in serving the JeeLabs.org and JeeLabs.net websites.
Well, up to a point, of course: there is still an ISP in the equation, providing connectivity, the routing of all traffic, and the DNS service. These are public internet sites, after all!
The weblog is a static site. There are no trackers, there is no JavaScript involved, it’s just what it’s supposed to be: pure content, from yours truly to anyone interested in this. As you should be able to verify yourself, the site also loads very quickly. And it scales very nicely - the average CPU load is 1%, on an 8-core ARM CPU. Site searches are forwarded to Google.
Other than possible security holes in nginx, or some silly oversight in its configuration, this setup has no meaningful way to “find a way in”. It’s outbound, and since all the information it serves is public and intended to be visible, there’s really no point in closing any parts off.
The community site is driven by Redmine, a well-maintained open-source software project, based on Ruby on Rails. The JeeLabs.net setup uses Nginx as web front-end (same instance as for the rest), Thin as Ruby application server (using four instances for load balancing), and good old (yawn…) MySQL as database layer underneath it all.
While it would be great to have a design based on this idea - there is not (yet?) an existing implementation which could make that happen. So JeeLabs.net will just have to make do with this more traditional database-backed web site approach. Luckily, both the load and the resource consumption are well within the current hardware’s capabilities. RAM use of the entire server tends to hover around 60% of the available 2 GB.
Gone are the VM’s, WordPress, Apache layers, and extra copies of Linux. Good riddance. The ≈ 20W lower power consumption translates to a 175 KWh savings per year, about 6% of the total yearly electricity consumption here at JeeLabs. Nothing stellar, but still nice.
There’s a simple rolling backup schedule and server to recover in case of serious trouble.
No data centres. No web-based admin panels. No remote logins. No VPNs or infinite layers of security. Just a little box drawing around 4W and a Fritz!Box router w/ NAT, sitting on the end of a fast FTTH internet connection. And no hemorrhaging fees at every corner.
If power fails, JeeLabs will be down. If the fiber link is down, then so is JeeLabs. So be it.
Time will tell whether this simplicity will also lead to robustness and reliability. In the past year, the JeeLabs sites have been online 99% of the time - the goal for 2016 is > 99.9%:
One closing note, for the record: access logs at JeeLabs are only kept for a limited time (i.e. days), and only to be able to pinpoint problems. If you want to be tracked, go elsewhere…
If you like (parts of) this approach, then please spread the word. Information sharing does not have to imply information gathering - nor riding along with every new “service” out there. A decentralised internet is perfectly capable of connecting people as it is, thank you.